- English
- Español
- Português
- русский
- Français
- 日本語
- Deutsch
- tiếng Việt
- Italiano
- Nederlands
- ภาษาไทย
- Polski
- 한국어
- Svenska
- magyar
- Malay
- বাংলা ভাষার
- Dansk
- Suomi
- हिन्दी
- Pilipino
- Türkçe
- Gaeilge
- العربية
- Indonesia
- Norsk
- تمل
- český
- ελληνικά
- український
- Javanese
- فارسی
- தமிழ்
- తెలుగు
- नेपाली
- Burmese
- български
- ລາວ
- Latine
- Қазақша
- Euskal
- Azərbaycan
- Slovenský jazyk
- Македонски
- Lietuvos
- Eesti Keel
- Română
- Slovenski
- मराठी
- Srpski језик
What Is the Installation Process for PPR Water Pipes?
2024-10-14
PPR (Polypropylene Random Copolymer) water pipes have become a popular choice for plumbing systems due to their durability, corrosion resistance, and ability to handle both hot and cold water efficiently. Their ease of installation and long lifespan make them a go-to option for residential, commercial, and industrial projects. But what exactly does the installation process for PPR water pipes entail? In this blog, we will take a detailed look at the step-by-step installation process and provide best practices to ensure a smooth, reliable, and long-lasting plumbing system.
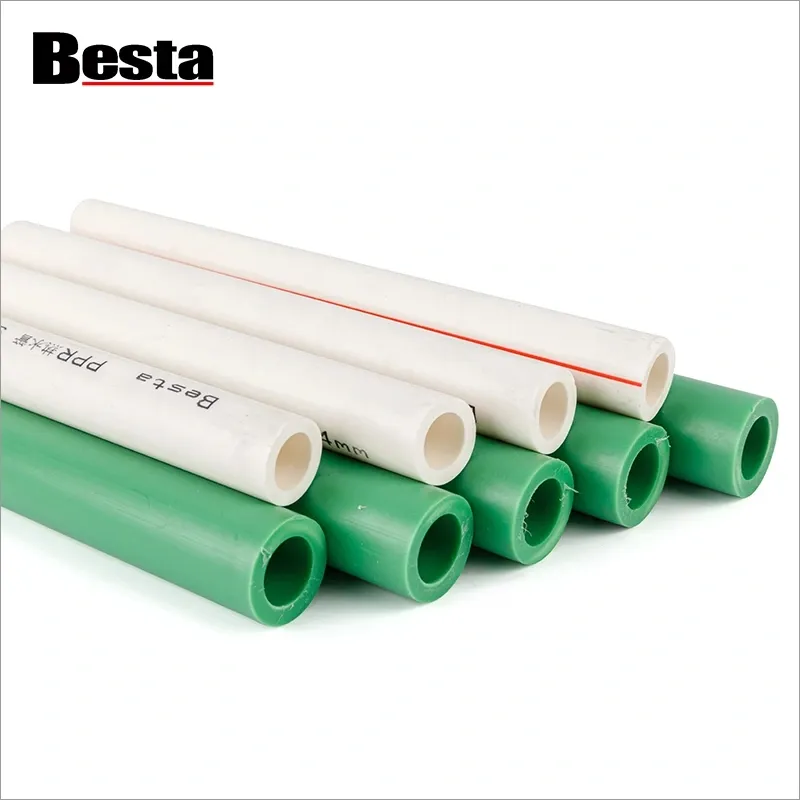
Why Choose PPR Water Pipes?
Before diving into the installation process, it’s essential to understand the benefits of using PPR pipes:
- Durability: PPR pipes are resistant to chemicals, scale, and corrosion, making them ideal for long-term use.
- High-temperature tolerance: They can handle hot water systems, as they can withstand temperatures up to 95°C (203°F).
- Eco-friendly and safe: PPR pipes are non-toxic and don’t leach harmful chemicals into the water, ensuring safe drinking water.
- Seamless connections: PPR pipes use heat fusion welding, which ensures leak-proof and durable joints.
Now, let’s explore the installation process step by step.
1. Planning and Design of the Pipe Layout
Before installing PPR pipes, careful planning and designing of the piping system are essential. This phase includes:
- Determining the pipe routes: Plan where the pipes will be laid out, taking into consideration the location of water sources, fixtures (such as sinks, showers, or toilets), and other plumbing equipment.
- Calculating water pressure and flow: Ensure the pipe dimensions match the required water flow rates and pressure. PPR pipes are available in various sizes, and selecting the right size based on the pressure needs of the system is crucial.
- Minimizing bends and joints: Reducing the number of bends and joints helps improve water flow and reduces the likelihood of leaks over time.
2. Gathering Tools and Materials
The installation of PPR pipes requires specific tools and materials to ensure the job is done properly. Some key items include:
- PPR pipes and fittings: These are the core materials, including elbows, tees, couplings, and other connectors.
- Pipe cutter: A specialized cutter is used to make clean and precise cuts on the PPR pipes.
- Heat fusion welding machine: A fusion welding tool is essential for joining the pipes and fittings. It heats the pipe ends and fittings so they can be welded together seamlessly.
- Measuring tape and marker: To measure the pipes accurately and mark cut points.
- Deburring tool or sandpaper: For smoothing rough edges after cutting the pipes.
- Level and plumb line: Ensuring proper alignment of the pipes during installation.
3. Cutting the PPR Pipes
The next step involves cutting the PPR pipes to the correct lengths based on the design of your plumbing system. Follow these steps:
- Measure the length: Use a measuring tape to determine the length of the pipe you need to cut.
- Mark the cut point: Use a marker to mark where the pipe will be cut.
- Cut the pipe: Use the PPR pipe cutter to make a clean, straight cut. A proper cut ensures a perfect joint later when connecting pipes and fittings.
- Smooth the edges: After cutting, the edges of the pipe may be rough. Use a deburring tool or sandpaper to smooth the edges, which helps with the proper fusion of pipes during the welding process.
4. Preparing for Heat Fusion Welding
PPR pipes are joined using a heat fusion process that ensures a leak-proof, durable connection. Before starting the welding process, ensure you have the necessary heat fusion tool and follow these steps:
- Preheat the welding machine: Turn on the heat fusion machine and allow it to reach the appropriate temperature (usually around 260°C or 500°F).
- Check the fittings: Ensure that both the pipes and fittings are dry and clean. Moisture, dust, or debris can affect the quality of the fusion joint.
- Insert the pipes and fittings: Place the ends of the pipes and fittings into the heating sockets of the fusion machine. Hold them there for a few seconds (based on the pipe size) to allow the ends to heat up and soften.
5. Welding the PPR Pipes
Once the pipe and fitting ends are properly heated, quickly remove them from the fusion tool and join them together:
- Align and press: Align the heated ends of the pipe and fitting and press them together firmly. Ensure that the alignment is perfect since the joint will solidify quickly.
- Hold in place: Hold the connection in place for a few seconds to allow the fusion to set and cool. This forms a strong, permanent bond.
- Inspect the joint: Check the joint for any visible gaps or misalignment. A properly fused joint will have a small, even bead of melted plastic around the connection.
6. Installing the PPR Pipes
With the pipes cut, welded, and fitted together, you can now proceed with the installation:
- Support the pipes: Use clamps or brackets to support the pipes along the planned route. PPR pipes, like other plastic pipes, can expand or contract with temperature changes, so allow some flexibility in the pipe supports.
- Align the pipes: Use a level and plumb line to ensure that the pipes are installed in a straight, horizontal or vertical line. Proper alignment helps maintain water pressure and flow efficiency.
- Bend the pipes if necessary: PPR pipes can be slightly bent by heating them, but this should be done cautiously to avoid damage. It's best to use elbow fittings for sharp bends to avoid stress on the pipes.
7. Pressure Testing the System
Once the installation is complete, the system needs to be tested to ensure there are no leaks and that the connections are secure:
- Fill the system with water: Slowly fill the pipes with water, making sure all connections are properly sealed.
- Pressurize the system: Increase the water pressure to the system’s normal operating level and inspect all joints for any signs of leaks.
- Monitor for a set period: Let the system remain pressurized for about 30 minutes to ensure stability. If there are any issues, repair the faulty joints by re-welding them.
8. Final Inspection and Cleanup
After pressure testing, perform a final inspection of the entire piping system:
- Check the alignment and support: Make sure that all pipes are still properly aligned and supported by brackets or clamps.
- Seal any wall or floor penetrations: If the pipes pass through walls or floors, use proper sealants to close off any gaps around the pipes.
- Cleanup: Clean up the workspace and remove any leftover pipe materials or debris.
The installation of PPR water pipes is a straightforward process that requires careful planning, proper tools, and a basic understanding of the heat fusion welding process. By following the steps outlined above, you can ensure a secure and durable plumbing system that will last for years. Regular inspection and maintenance after installation will help prevent future issues and ensure the continued efficiency of the system.
Ningbo Ouding Building Material Technology Co., Ltd. is a comprehensive enterprise integrating mold manufacturing and injection molding. Founded in 2010, the company has complete mold processing equipments, mold design and mold manufacturing teams, as well as a professional pipe production line to produce PPR pipe, and multiple injection machines to produce complete PPR pipe fittings, valves, etc. Learn more about what we offer by visiting our website at https://www.albestahks.com. For questions or support, contact us at devy@albestahk.com.